Tuesday, December 8, 2009

A little history

So I am in a place where there is a lot of my work out there and a lot of it I have lost track of. Building and creating is something I really enjoy and if there is a opportunity I go for it. Here is a small sample of my work. The reason for the P.J project is that I really wanted to challenge my self and pull out of the same old work. Below is a small entertainment center that I built out of oak. This next project was both my design and build. Wanted a dresser that would have a big enough bottom drawer for blankets and such. The dimensions worked good. Decided to do solid maple stained to look cherry, with a mission design. This worked good have some things that I would do differently but has been a good solid design and held up to all the moves.


This desk is also my design wanted something that I could have a computer and enough room out front to do paper work and drafts. Most of my work is done on CAD now the room out front is still good and again has worked out as a real solid design and built like a tank. Solid oak and stained the famous rich mission color.


The next display case I built for a former employer. The glass was done by some one else and donated and needed a way to show it off. This was a fun project the challenge before me is that all I had is a verbal "I would like to have something in oak with curves". I came up with this on paper and they liked it. The rest is history. Most of the project is solid oak "car siding". The hardest part of the project was the lighting my original idea did not work then revamped with a LED light track right under the glass that worked really good.


The last project is a solid cherry clock that I built. This was built from plans and yet had some interesting challenges. My first clock and the cherry has done a beautiful job of showing off the best part as it gets older the cherry continues to come up with new deeper character. This is a real charm for any house.


Monday, December 7, 2009

It has been a long stretch again. Continue to plug away and now have started to do set up for the second rig. Dix written directions are a bit confusing for me yet with some patience for me to get with the program was able to make forward progress. I also want to give a couple of end of season notes. First on the Interlux top coat (came with grip sand in it) really good stuff keeps you from falling, yet a bit aggressive takes skin off real quick and is very hard on any hardware that is on deck. I started to tie all hard ware up off the deck for any travel time on the trailer. I also was not happy with the performance of the bottom paint (also Interlux) does not hold up to any hit at all. I have two coat on yet wore through in the area where it sits on the wheel of the trailer. This is not a full up date for this second rig. More to come. I finally broke down and put the Kayak away for the season on December first. It is going to be a long winter!
I was not ready to put the jib in place came up with simple bungee to keep it from bagging around. The next two pics give you how I put force into bring the 4'' bend in the mast. I used the up hall line cleated into the cleat on the bottom of the mast. Note that I flipped my boom upside down and use the out board end thumb cleat to lock the line in place. Lastly just a one inch friction strap. The first two inches of bend in the mast come pretty easy. The last two made me a bit nervous the mast stood up to it and the final bend came in beautifully between the lower and upper shroud connection points. You will also note that I added a 3/4'' dia rubber plug on the bottom side of the outboard end of the boom. The interdeck grip was especially hard on that and the tiller extentions.


If you look close there is a green 5/32 line that I tied to the goose neck and ran over the top of the mast before lifting the mast to help sight in the amount of bend being put in the mast.
This is the port side of the shroud lines. The short (7'3'') on the star board side ended up way to long (my tape measure lied to me) so I have to go get a new eye on it.


Thursday, October 15, 2009

Hard lessons of life

I had a whole role ready to get up and going. Just put out a beautiful coffee table and had a lot of updates and fun stuff on the boat. Lost it all due to old camera not advancing the film correctly. I knew it had seen its better days, now I could just kick my self to china and back for not replacing it. All in process pics of the table are gone. More good stuff is on its way we have been locked into a bad cold and rainy season here and looking for a dry stretch to set boat up and do some dry runs on the cat rig. Plus i have a really cool opportunity to make a heirloom rocking horse for my sister who is expecting in February. Pics are on the way on both getting the itch to do stuff now that i have been kicked inside the past three weekends in the row! Ready to go!

Wednesday, September 30, 2009

I am back!!!

First some updates details and hard ware issues. So here I am at the machine shop that I work at. We have a nice 48''x48'' electronic scale can not see the read out here sorry about the bad pic. The haul weight out at 95lbs, and with all the other goodies the total weight was 125lbs. This is the una rig hole the only thing I got a chance to run this season yet it proved to be a very fun, fast rig for my purpose mainly learning this boat and wind conditions on the small lake that I have easy access to. This pic shows the loop for the vang and the out haul running correctly the only thing that needs to change here is to move these in a bit and add a 424 fair lead on each side for the cunningham.
Here is the out haul coming down from the boom the right side is the WRONG! way to run it. It ends up holding up the reach ability on the boom. The left runs down the mast to 424 fair lead and down to deck cleat.

Here is my una rig mast step. It looks ugly yes I know. Not sure what I did wrong. My logical conclusion was to first to drill the hole through the mast set it in place cut my aluminum set them on center of mast step with mast in step used a long scratch all to mark location then drilled my holes. The look off center yet work really well. What works really good is that I have a extra long 1/4'' bolt that I push all the way through and thread on the nut half way and the push back till the nut catch on the one of the screw that secure the bracket down. This locks every thing in. Looks not good yet works extremely well. Sorry about the bad pic nut is on the left catches on the crew above.

Here is a new main sheet block. The one called out on Dix print is discontinued so West marine recommended something else (Ronstan) I spent an entire month scratching my head going am I stupid or is this thing not right. Finally broke down and called Annapolis Performance (Hind sight tells me that these guys are much better at sail boat stuff than West Marine!!!) they recommended a Harken 2138 pic here this works much better!

Out haul tail here attached to a wonderfully sail by Baxter. I need to redo the small line that keeps the sail down to the boom. This current idea is ok yet needs improvement. Update will come as I do some trial and error.

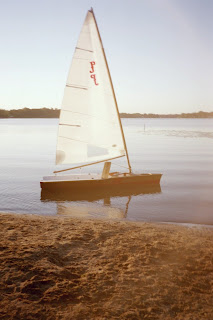
Here is some on the water pics in some very calm conditions. Just one of those day set out with good conditions by the time my friend got out on the power boat to take these pics all wind quit. grrr..


FIRST WAR WOUNDS!! On the elbow the day aft the pics above had much more challenging conditions. The Interlux top coat with grip works good yet easily tears the flesh right off you.

On a performance note I am so impressed with the amount of speed you can get out of the una rig. I was out in 9-13 knot winds got her going fast enough to get the out haul lines howling in the wind. Saturday step up a bit to 10-15 knots had lots of fun. Then Sunday it stepped up again 18-22 knots. I had so much fun and learned just how much she will take. I also had my first at speed spill. Had her heeling pretty good heading south on an east wind at a good clip. I knew I was on the edge just needed to push to learn more. A gust came up and put me over. I went in on the heeling side just under the boom had enough time to un-cleat the main sheet did not have enough time to in hale before hitting the water. Needless to say the only unpleasant thing of the whole experience was the amount of water I took in through the nose and such. Swam around to the rudder regained breath then went around to the center board grabbed the righting line about in line with center board put a knee on the center board and put my hands on the wing and gave a little pull and she came right up. With the main sheet un cleated she waited patiently while I swam back around to the back climbed in over the rudder. Got on the deck and regained full composure sheeted in and off we go. Best news was with this clear step up in wind conditions there are no signs of stress on the deck ring and no signs of stress in the x deck. I have not even touched the jib! Can not wait … winter is going to be a long one this year.
Some closing pics is a must. I was able to sail right into the last weekend of Sept. This is good for my area. My hope is to add a wetsuit for next year so I can get a little longer season in.
Two of them make a great pair. The CLC 16' Kayak is over five years old now yet still is going hard and strong! Just keep a good coat of varnish on it and it remains unstoppable. This is what my back porch area looked like most of the summer take off early morning before the wind came up in the kayak then take off in the afternoon for a good sail. This works out for more fun than you can swing a stick at. It is going to be a long winter yet look forward to updating the sail boat and getting it honed in ready for the cat rig so that is ready to go for spring!


Monday, September 21, 2009

LONG TIME NO HEAR YEY I KNOW

Long time no hear yes I know. Been completely consumed getting the PJ going. Spent the entire month of July with the wrong main sheet block. The one called out by Dix on the prints is discontinued. So West Marine gave me one that they recommended it just did not work out for my purposes. It was not letting the main sail out fast enough and cleat was not adjustable I kept busting my knuckles on the deck when I went to un-cleat. I gave Annapolis Performance a call (hind sight tells me that these guys are much better at the sailing stuff then West Marine!). Got me set up with a much better option (pics and details will come when I get a chance). Got the new main sheet block on just in time for Labor day weekend to find out that I was limited on my reach ability in the boom. Got a good amount of sailing in any way just limited me on how much I could do. Found out that it was my out haul lines that were holding me up. Come to find out I needed to run the out haul lines the same way I had the Cunningham lines ran. Both sets of lines get ran down the boom to 424 Harken fairleads. Prints call out for just one set of fairleads you need two sets (one for Cunningham one set for outhaul) on the top of the x deck. I did not have extra on hand at the time so I ran both sets through the same fairleads it worked for the short term. Finally got good sailing in the weekend after Labor day. I got a real good amount of sailing in this Friday, Saturday and Sunday. I am so impressed with the amount of speed you can get out of the una rig. I was out in 9-13 knot winds got her going fast enough to get the out haul lines howling in the wind. Saturday step up a bit to 10-15 knots had lots of fun. Then Sunday it stepped up again 18-22 knots. I had so much fun and learned just how much she will take. I also had my first at speed spill all my other spills have been in launch or landing (the haul is such a high performance shape that when she is at slow speed it is very easy to spill it). Had her heeling pretty good heading south on an east wind at a good clip. I knew I was on the edge just needed to push to learn more. A gust came up and put me over. I went in on the heeling side just under the boom had enough time to un-cleat the main sheet did not have enough time to in hale before hitting the water. Needless to say the only unpleasant thing of the whole experience was the amount of water I took in through the nose and such. Swam around to the rudder regained breath then went around to the center board grabbed the righting line about in line with center board put a knee on the center board and put my hands on the wing and gave a little pull and she came right up. With the main sheet un cleat she waited patiently while I swam back around to the back climbed in over the rudder. Got on the deck and regained full composure sheeted in and off we go. Best news was with this clear step up in wind conditions there are no signs of stress on the deck ring and no signs of stress in the x deck. This is a boat full of fun and I have not even touched the jib!

Wednesday, July 8, 2009

THE LAUNCH HAS HAPPENED!!

Final varnish pics.


Detail pj#. The next couple of pics are detail of final boat work. It literally turned out so good I could not get a pic to turn out with out a reflection of something showing up on the the boat.


Rub rail and bright work detail. Just wonderful final out come. Lots of hard work, sanding and detail. Yey what 22' worth of mast really looks like. Next couple of pics are deck pics. The last blog will show how I came up with the V it looks really good complete with all bow spirit goodies in. Note all hard ware is on in third pic went on really fast also note the cedar/pop mix on the rub rail.


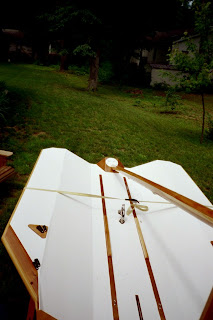
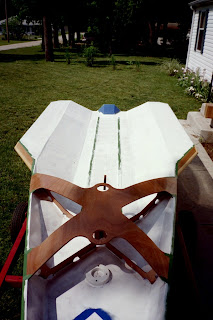
Stupid things happen to those who try to do to much in a day. I had ran a high amount of hours at work and stretched time at home just to get a chance to get the boat on the water. I went to to one last final fit of mast with sail on and try all the lines. Set the boat on the lawn and went to put the 22' mast in place when the boat rocked on me lost my balance and the 22' took off and snapped the nose off the X deck. Probably the most heart breaking moment of all my works. I have broken stuff not like this. Epoxied it back together and then came up with a real nice way to add structure back. The final fix pictures will come later. The matter is not how bad you break it. It is a matter of how you recover and fix it. The key is I kept all scrap and it saved my life as far as final fix. Well it does float and it will sail from this point I need to rerun some of the lines. Line, hard ware, and better pics to come as soon as I get time to do more head scratching. THIS PIC HAS THE MAST AT THE WRONG ANGLE! I did fix it new pics show the correct angle. Thanks to Dix and Baxter sails helping me to understand correct the issue. How I got it wrong? I drilled a two small holes in the deck panel to mark center point for the mast post steps before I set a the deck panel so I knew where the mast frame post were. I then set the x deck not knowing it could would vary a bit. I set the mast post steps exactly on center of the drilled holes. Basically ended up resetting the mast post steps about a quarter inch back towards the stern after I finally realized the x deck was a bit off its set.


Friday, June 26, 2009

The mast post detail going in and strong.
Masking of the the boat has begun. The lay out of my lines on the bow were easy taped 2 8x11 paper together to make a square put a point on center then ran that up the bow till the two outside tips hit the side of the boat. Worked out really easy and quick.

Here is the first attempt at using Interlux prime coat. It is a more complex 3-1 mix with reducer never worked with paint like this. It is an epoxy I had a hard battle all the way through this kicked off way to fast and left me with really bad and ugly finish. The good news is that this is all covered with thick paint that has sand in it for traction. The prime coat was all bad news, to hot, to fast of kick off it literally was pulling the foam off of the roller!! The pick below is the Interlux top coat and went on really nice much more like paint! SAILS ARE IN!!!! Thanks to Dave at Baxter sails great service excellent workmanship!!!www.baxtersailmakers.com Start and finish to the bow detail. This was much easier than I thought it would be just some patience, a little skill with a chistle, little knife work and ended up with a real nice fit. Used my scroll saw to cut the angles in and now really wish i could go back and do the wing tips on the same saw it really works well for this multi angle stuff. All you need is a good lay out and eye.


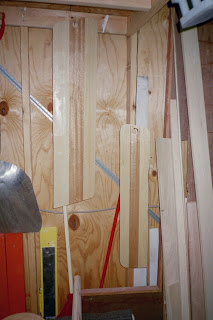
Epoxy and glass work being done on center board also how I did the dagger board. There is a trick to getting glass to lay down on such a thin object. Got to lay the epoxy on thick enough to saturate the glass and catch the runs as needed. Hanging it this way lets you get both sides at once. Varnish work on the boom getting done this is also how I put the epoxy on. Trial fit of mast in both positions just to make sure. Here is the prime coat going down on the bottom side went a lot better two corrections done to help it work better for me first is doing it during the morning during the cool of the day and secondly is that this product works best with thick coats not thin coats. The lay of the lines was simple here my 2'' glass tape over the center joints had the most sin in them. Hind sight tells me I could of covered a lot with a quick layer of #4 glass over the center joint area. At any rate I recovered nicely with this simple lay out used a 12'' roller and laid it out using the holes from the stitching process to establish a consistent mask area. No real math involved just done by eye on the first side until I got what i wanted then transferred all to the second.

First coat of Rochelle red Interlux perfection. Went down a lot easier than their primer. Going to be a seriously beautiful boat. Lots of sanding to get to this point about 3-4 times more than the build time. Final coat looking good. The varnish work on the mast screw in the bottom the pvc cart is a start on a cart for the boat used that to support at the connection end. Not easy to varnish round things the final product turned out good. Here is the dagger board and center board getting varnished. It was easier to leave out the handles until all finishing was done and then touch up the handles. Here is my set up for trimming in the mast and top mast for the connection which I made from aluminum tubing. I found a excellent source at http://www.globatecheng.com/ I went with the 2.5 tube 11 gauge .120 wall then turned off .4o off the out side diameter and left the tube just a little thick at .090. Hope to get better pics of the mast soon.